How to Restore Volume Snapshot and Backup?
Restoring Volume Snapshot
Restoring a volume snapshot refers to the process of reverting a volume to a previous state captured in a snapshot. A volume snapshot is a point-in-time copy of the volume's data, including its configuration, files, and settings.
Step 1
Log in to the xconnect portal. (opens in a new tab)
Step 2
Under the Project tab, open the Volumes tab and click on Snapshots.
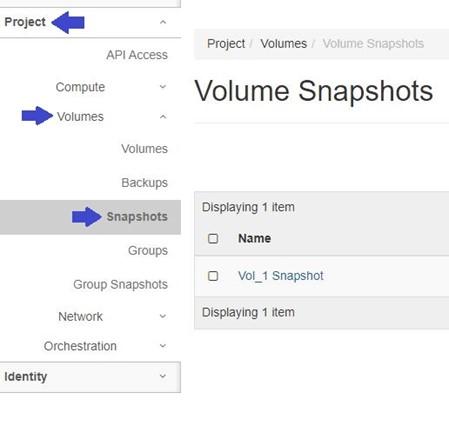
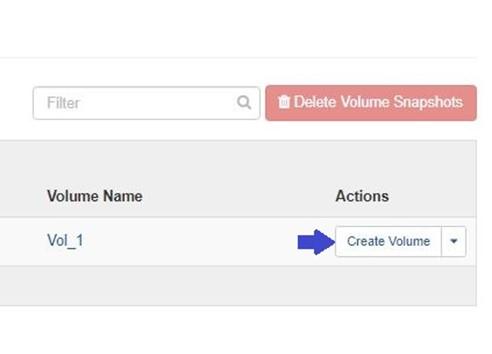
Click the "Create Volume" button of the desired snapshot to restore it as a new volume.
Step 3
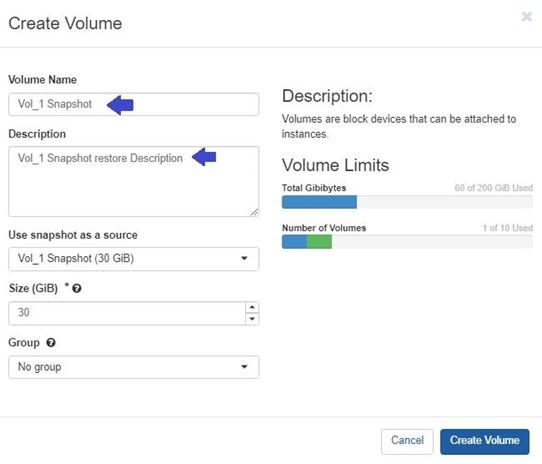
Specify New volume parameters:
Volume Name: Specify a name for the volume.
Description: Optionally, provide a brief description for the volume (e.g., Vol_1 Snapshot restore Description).
Use snapshot as a source: The snapshot you chose will be automatically selected as the source for the restoration process.
Size (GiB): The size of the restoring volume in gibibytes (GiB). Note: You can extend the size of volume while restoring snapshot.
Group: It is the group which the new volume belongs to. Choose 'No group' if the new volume belongs to no group.
Step 4
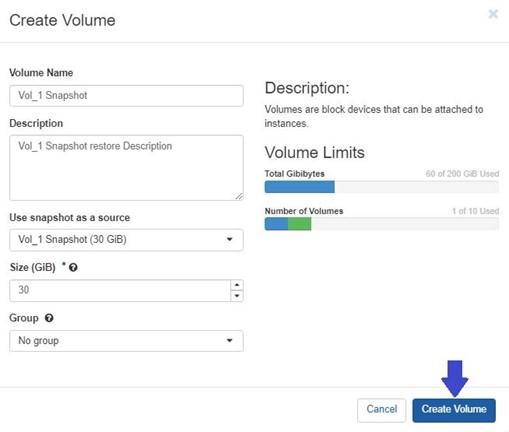
To complete the restoration of the snapshot as a new volume, click on the "Create Volume" button.
Alternatively, you can restore volume snapshot by directly creating a volume and selecting source type as snapshot.
For more information, please refer to this guide
Restoring Volume Backup
Restoring a volume backup involves recovering a volume from a backup copy that has been created and stored separately. A volume backup is a full copy of the volume's data, typically including all its contents and attributes.
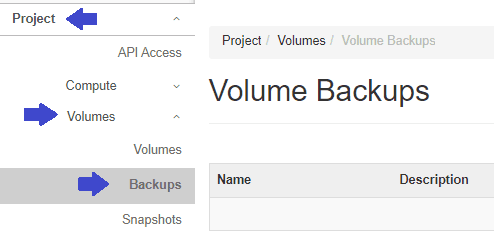
Step 1
Log in to the xconnect portal. (opens in a new tab)
Step 2
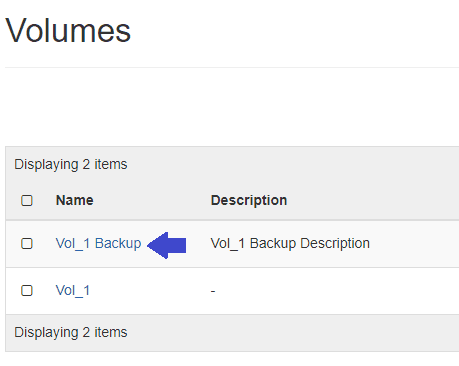
Under the Project tab, open the Volumes tab and click on Backup.
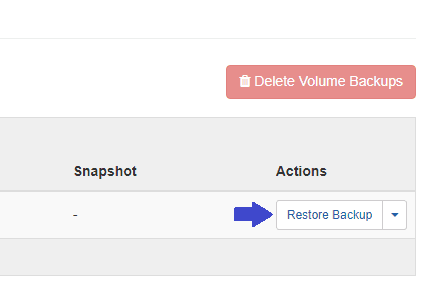
Click on "Restore Backup" button for the desired volume to initiate restoration.
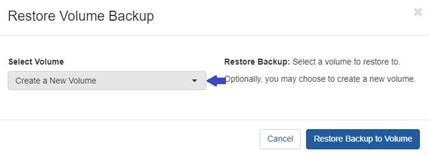
Step 3
In "Select Volume", you have two options to restore a backup of a volume: you can choose to create a new volume or restore it into an existing volume.
Note: You can only select an existing volume to restore backup when it is not attached to any VM, and after restoring backup, all the previous data on that volume will be erased.
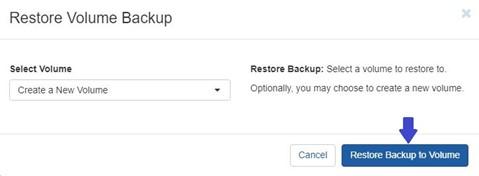
Step 4
Click on "Restore Backup to Volume" button to complete the restoration process.
After restoring backup, a new volume of the same name will be created.
You can attach this to a VM to access the data.
For instructions on how to attach a volume to a VM, please refer to this guide.