How to Upload an Image on OpenStack
Using the Command Line Interface (CLI)
Firstly, log in to your OpenStack CLI using the RC file.

To learn how to access the OpenStack CLI, refer to this document.
Then upload the image to OpenStack using the following command:
openstack image create ImageName --file /path/to/image-file --disk-format raw --container-format bare --public --progress
Example:
Parameters Explained:
ImageName: The name you want to give to the uploaded image.--file /path/to/image-file: The path to the image file that you want to upload.--disk-format raw: The disk format of the image.--container-format bare: The container format of the image (typicallybareunless you have a specific container format).--public: Makes the image accessible to all users in the OpenStack project.--private: Restricts access to only the user who uploads the image.--progress: Shows the progress of the image upload.
Using the XConnect Dashboard
-
Log in to your XConnect account.
-
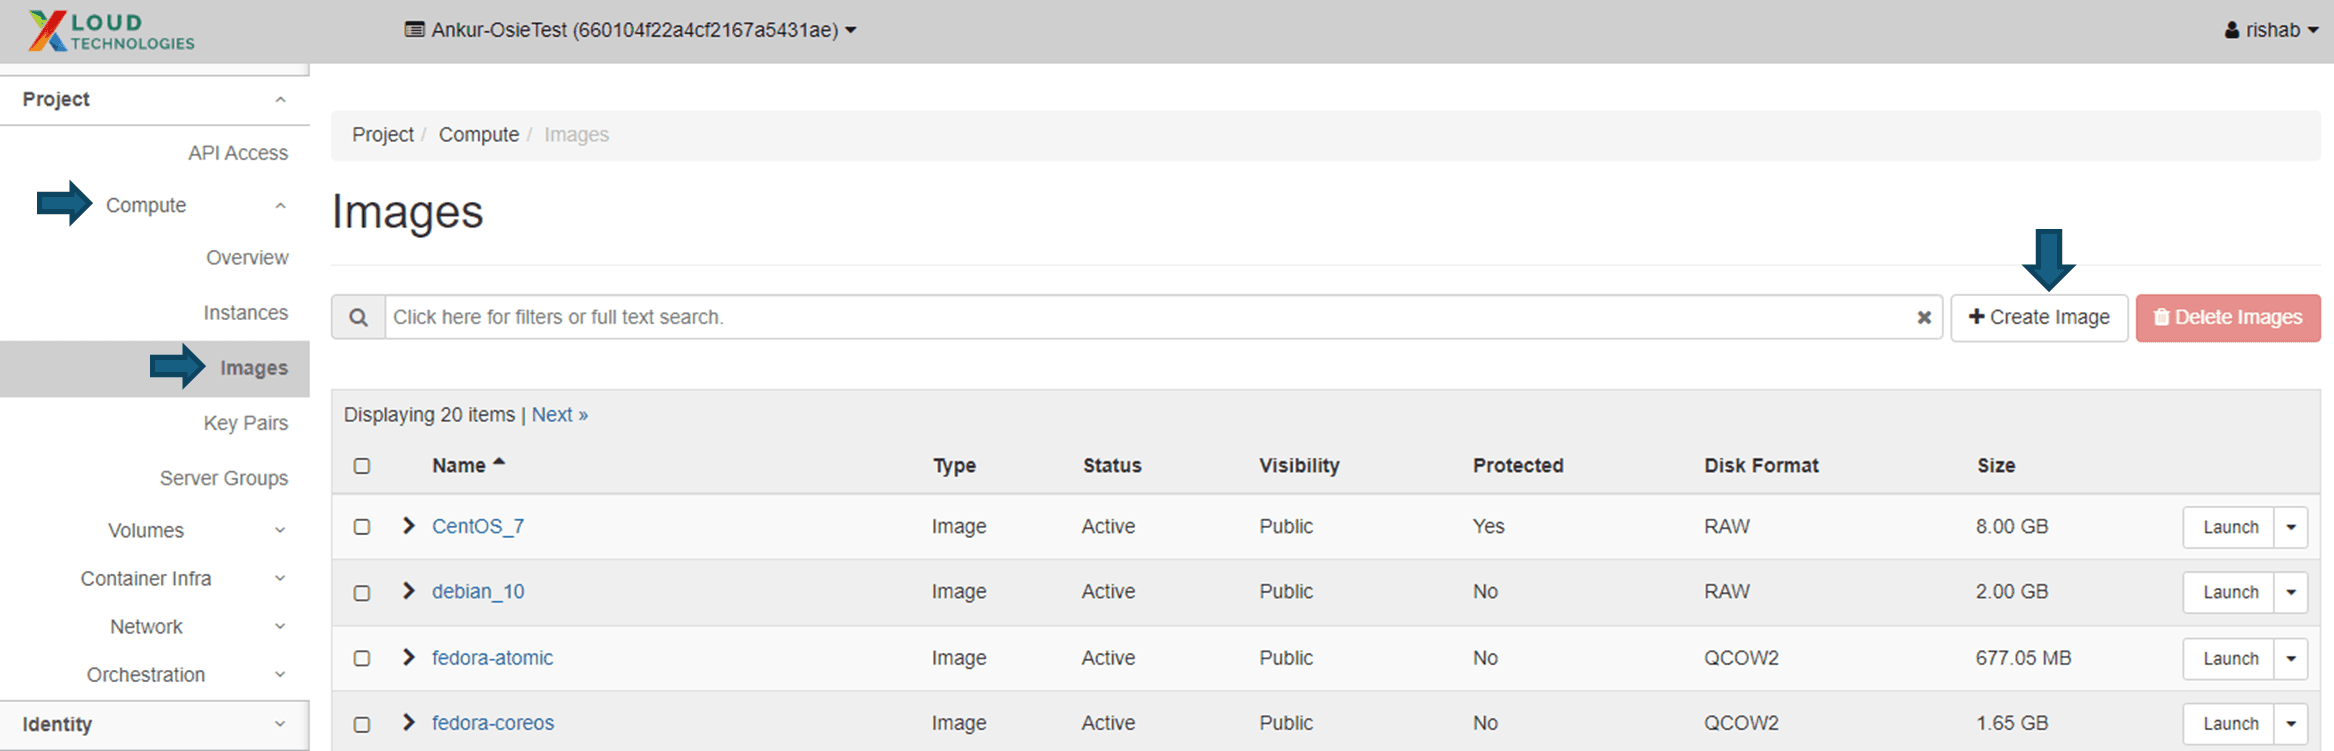
Navigate to Compute > Images and click on the Create Image button.
-
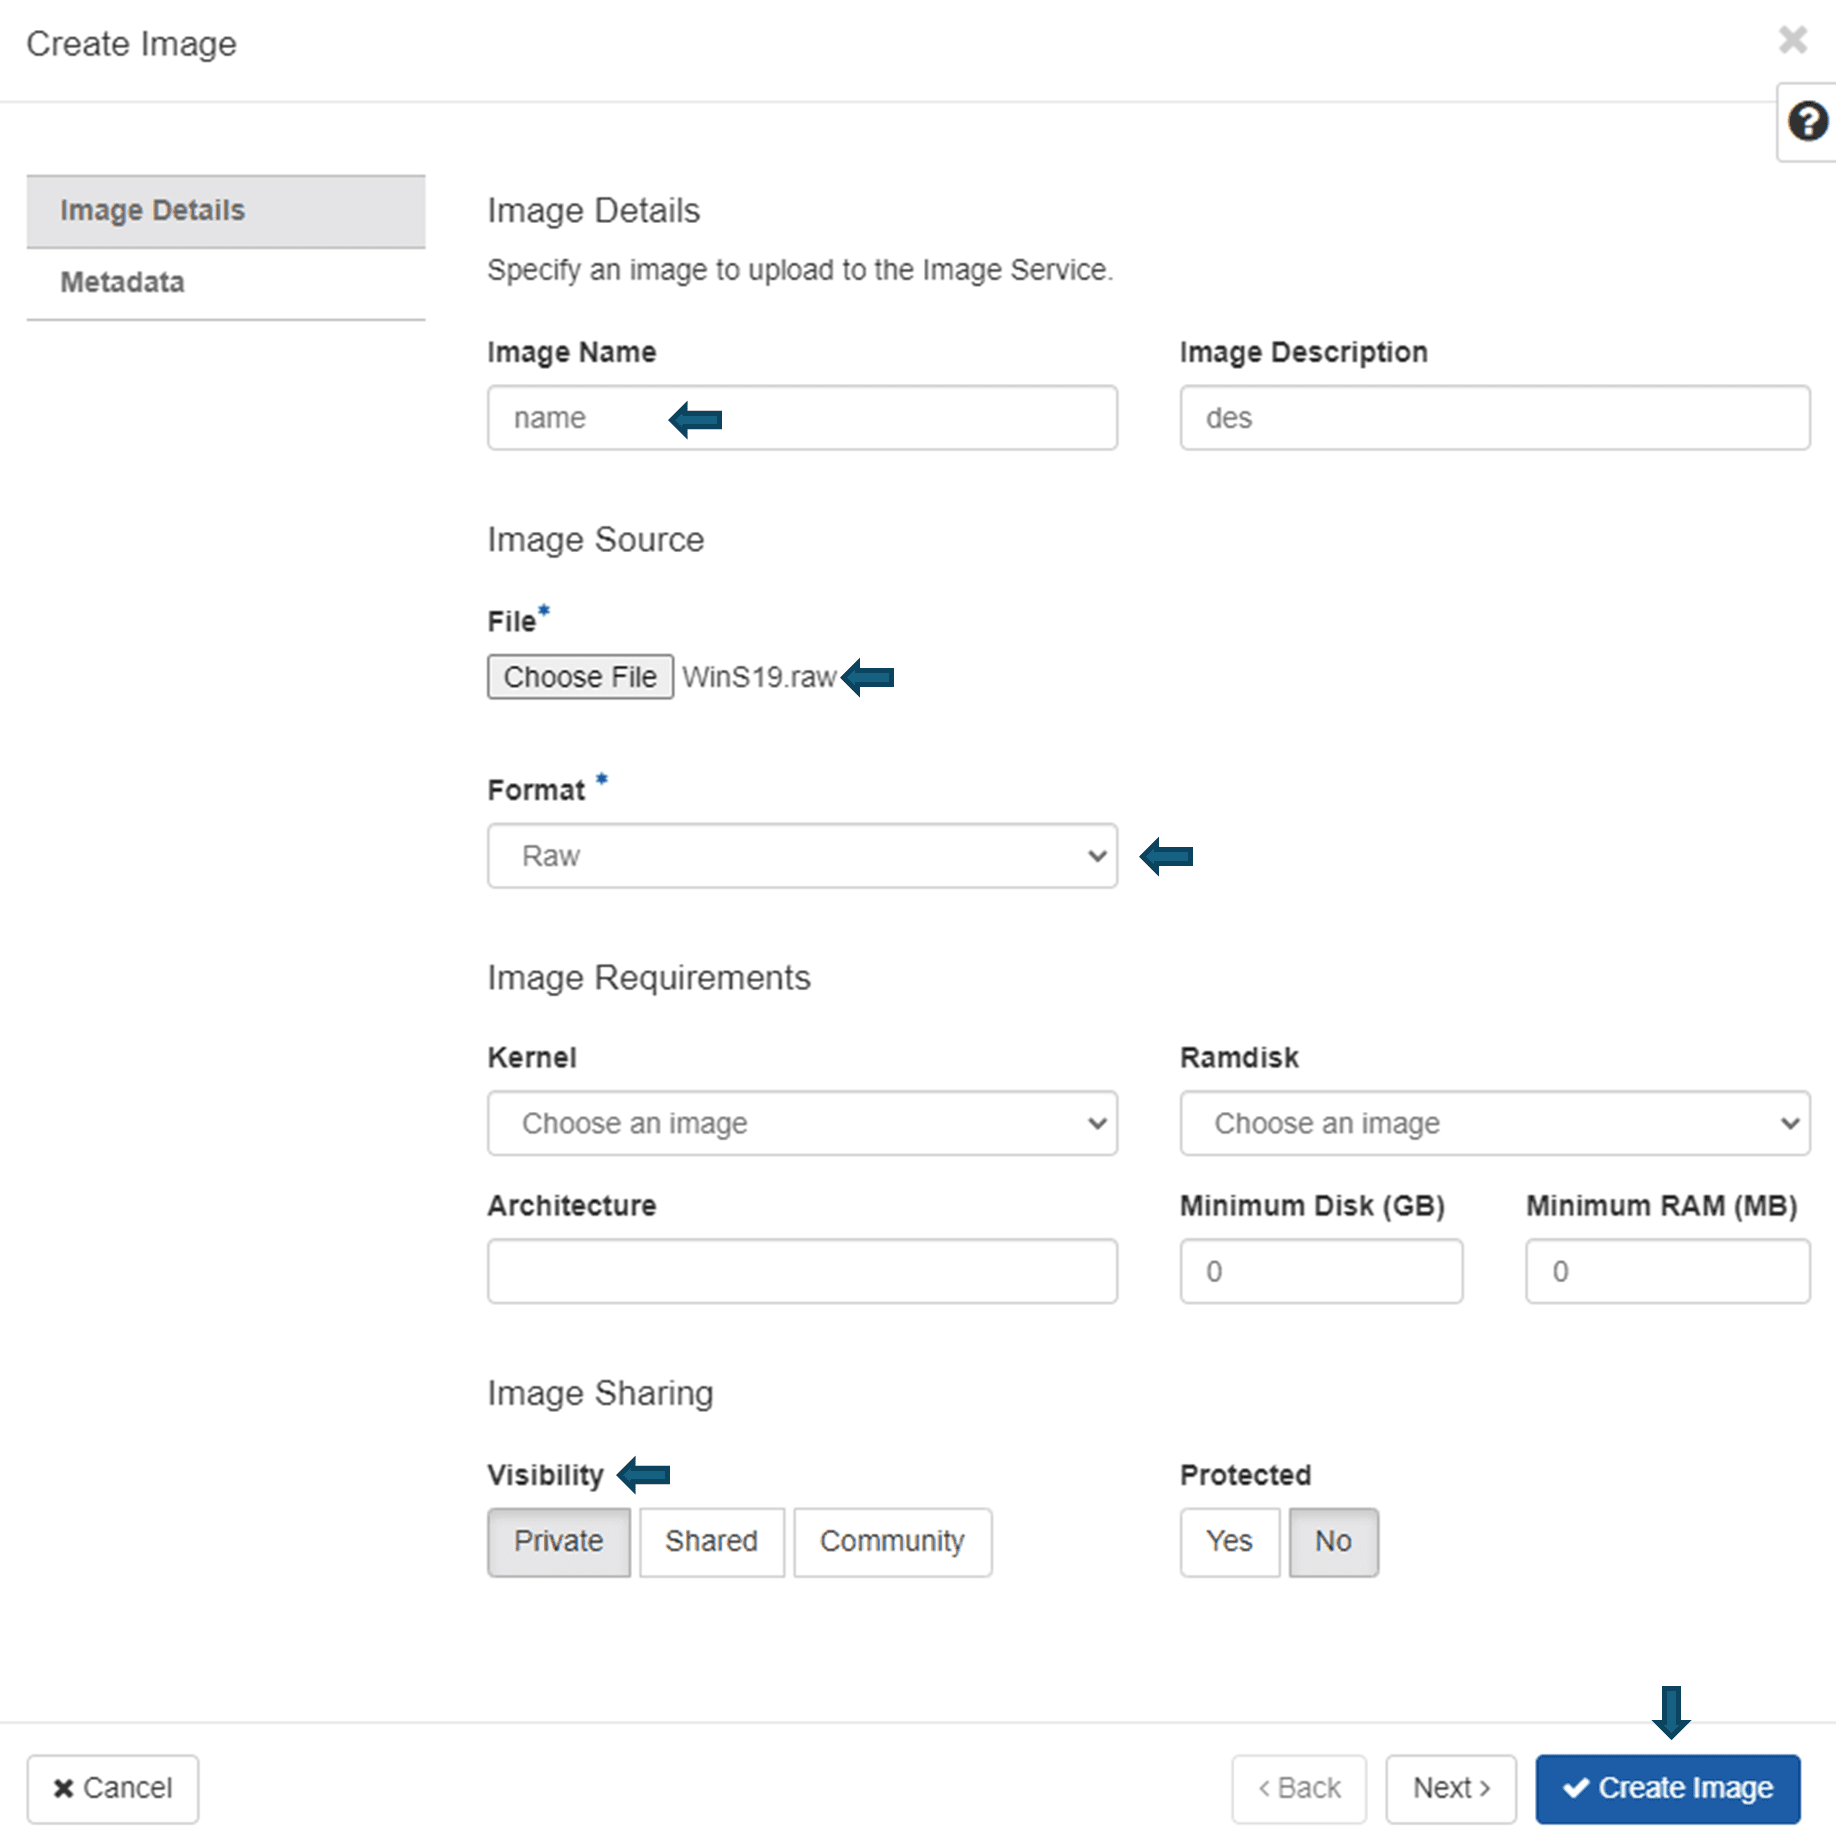
Provide the necessary details:
- Name: Enter a name for the image.
- Image File: Select the file you want to upload.
- Format: Choose the format of the image.
- Visibility: Select the visibility option (Private, Protected, Public).
-
Click on the Create Image button to upload the image.